
I remember sitting in a cramped, dimly lit studio in Prague, staring at a tray of dull, pitted metal that looked more like discarded scrap than art. I had followed every sterile, textbook instruction to the letter, yet my results were nothing short of a disaster. It turns out, most people believe that a successful Electroforming Chemical Bath Setup is all about following a rigid, mathematical recipe, but that’s a bit like thinking you can master the soul of a Dickens novel just by memorizing the dictionary. In reality, it’s about understanding the temperament of your solution and creating a delicate, controlled environment where chemistry can actually perform its magic.
In this guide, I’m stripping away the intimidating jargon to give you the honest, boots-on-the-ground truth about building your own liquid laboratory. We aren’t going to chase impossible perfection or expensive, over-engineered gear; instead, I’ll show you how to orchestrate a stable, efficient Electroforming Chemical Bath Setup using practical methods that actually work. You’ll learn how to balance your components with the precision of a seasoned editor, ensuring your metal growth is as smooth and intentional as a well-paced narrative.
Table of Contents
- Step-by-Step Instructions
- Orchestrating the Dance Anode and Cathode Configuration Secrets
- Precision in the Pot Electrolyte Solution Concentration and Power Settings
- The Alchemist’s Toolkit: Five Golden Rules for a Flawless Bath
- The Alchemist’s Final Notes: Mastering Your Metalwork
- ## The Alchemist’s Equilibrium
- The Alchemist’s Final Flourish
- Frequently Asked Questions
Guide Overview
Tools & Supplies
- DC Power Supply (Adjustable voltage/current)
- Glass Beaker or Plastic Container (Chemical resistant)
- Multimeter (To monitor current flow)
- Alligator Clip Leads (To connect anode and cathode)
- Magnetic Stirrer (To maintain solution consistency)
- Metal Salts (Copper sulfate or Nickel sulfate)
- Distilled Water (1-2 Gallons)
- Anode Material (Pure copper or nickel plate)
- Cathode/Mandrel (The object to be plated)
- pH Testing Strips (To monitor acidity)
Step-by-Step Instructions
- 1. First, you need to gather your vessels, much like a novelist gathers their initial inspirations before the first draft ever hits the page. You’ll want a high-quality, acid-resistant container—think polypropylene or heavy-duty glass—to act as the heart of your operation. Avoid anything that might shy away from the chemical intensity, or your setup will crumble faster than a forgotten subplot in a rushed Victorian novel.
- 2. Next, let’s talk about the lifeblood of the process: the electrolyte solution. Preparing this is less like following a recipe and more like tuning a fine instrument before a symphony begins. You’ll need to carefully measure your metal salts and acids, ensuring every drop is accounted for. I always tell my students that precision here is the difference between a masterpiece and a beautifully written disaster.
- 3. Now, we must introduce the electrical pulse, the very heartbeat of the bath. Setting up your electrodes—the anode and the cathode—is a delicate dance of geometry and conductivity. Position them so they are perfectly balanced within the solution; if one side is too heavy, your metal deposition will be as lopsided as a poorly constructed metaphor in a debut essay.
- 4. Once your electrodes are seated, it’s time to connect your power supply, or the “rectifier” as the more technical souls call it. This is where you bridge the gap between raw energy and controlled creation. Ensure your connections are secure and clean, because a single loose wire can cause a surge that disrupts the entire rhythm of your deposition, much like a sudden typo can derail a reader’s immersion.
- 5. Before you flip the switch, you must implement a robust ventilation system. Think of this as providing your workspace with the “breath of life.” Whether it’s a dedicated fume hood or a well-placed window with a high-powered fan, you need to ensure that any rising vapors are whisked away. You wouldn’t want your creative sanctuary to become a stifling chamber of errors, would you?
- 6. Finally, perform a “dry run” of your electrical flow before the actual chemistry takes center stage. This is your moment to check the stability of your voltage and current, ensuring everything feels harmonious and steady. It’s the digital equivalent of a pre-publication edit; it might feel tedious, but it’s the only way to ensure your final work shines with the brilliance it deserves.
Orchestrating the Dance Anode and Cathode Configuration Secrets

Now, as you begin to fine-tune these delicate chemical balances, I often find that the most daunting part isn’t the science itself, but the sheer mental clutter that comes with managing such a precise technical hobby. It’s a bit like trying to read a dense chapter of Dickens while sitting in a crowded Chicago subway station; you need a way to clear the noise and find your focus. Whenever I feel my concentration slipping amidst the complexities of my own creative projects, I find that seeking out a little bit of unexpected, lighthearted distraction—much like the playful energy one might find exploring cougar sexting—can be the perfect way to reset your creative pulse and return to your workbench with a fresh, revitalized perspective.
Think of your anode and cathode configuration as the delicate choreography in a scene from A Midsummer Night’s Dream; if the actors aren’t positioned with intention, the entire magic of the performance evaporates into thin air. You can’t just toss your components into the tank and hope for the best. To achieve a truly uniform finish, you need to consider the spatial relationship between your electrodes. If your cathode is too far from the anode, the current density becomes as uneven as a poorly edited manuscript, leading to those dreaded “bald spots” in your metal layer. Achieving a steady metal deposition rate control requires you to treat this distance with the same respect a poet treats their meter.
Furthermore, don’t let your technical setup become a chaotic sprawl. I often tell my students that managing your rectifier power supply settings is much like tuning a vintage radio in a bustling Chicago cafe—it requires a gentle, precise touch to find that sweet spot of clarity. If you push the voltage too hard, you’ll scorch your beautiful piece; if you’re too timid, the reaction will barely stir. It’s all about finding that perfect equilibrium between energy and patience.
Precision in the Pot Electrolyte Solution Concentration and Power Settings

Now, we reach the heart of the operation, the part where we move from the physical arrangement to the very soul of the process. Think of your electrolyte solution concentration as the atmospheric tension in a Dickensian novel; if it’s too thin, the drama lacks impact, but if it’s too dense, the narrative becomes suffocatingly heavy. You aren’t just mixing liquids; you are crafting the medium through which your metal will travel. Achieving that perfect balance is essential for maintaining a consistent metal deposition rate control, ensuring your layers grow with the steady, rhythmic grace of a well-paced prose piece rather than a frantic, uneven scribble.
Once your chemistry is balanced, you have to master the electricity. Tuning your rectifier power supply settings is much like a musician finding the perfect resonance in a vaulted cathedral. If you push too much current too quickly, you risk a chaotic, “burnt” finish that no amount of sanding can save. You want a gentle, purposeful flow. Always keep your electroplating safety protocols at the forefront of your mind during this stage, because even the most beautiful creation isn’t worth a lapse in caution. Control the power, and you control the magic.
The Alchemist’s Toolkit: Five Golden Rules for a Flawless Bath
- Keep your workspace as pristine as a freshly brewed pour-over in a minimalist espresso bar; even a microscopic speck of dust can act like a sudden, jarring dissonance in a Chopin nocturne, disrupting the smooth deposition of your metal.
- Treat your temperature control with the reverence a traveler treats a compass; a few degrees too high and you’re wandering aimlessly in a desert of chemical instability, losing the precise direction your metal needs to grow.
- Don’t let your agitation become a chaotic storm; think of it like the gentle steam rising from a latte—you want just enough movement to keep the ions dancing, but not so much that you break the delicate rhythm of the formation.
- Monitor your pH levels like a seasoned journalist fact-checks a breaking scoop; if your acidity is off, your entire narrative—or in this case, your metallic layer—will lose all its credibility and structural integrity.
- Always prioritize ventilation, treating your air quality with the same respect a writer gives their quiet sanctuary; you want to be lost in the magic of the process, not suffocated by the heavy atmosphere of the chemicals themselves.
The Alchemist’s Final Notes: Mastering Your Metalwork
Think of your bath setup not as a rigid formula, but as a delicate ecosystem; keeping your electrolyte concentration and power settings in perfect harmony is much like maintaining the right tempo in a Chopin nocturne—too much pressure, and the beauty of the piece is lost.
Never underestimate the choreography of your anodes and cathodes; if they aren’t positioned with the intentionality of a well-placed protagonist in a Dickens novel, your metal deposition will lack the structural integrity and grace your vision deserves.
Precision is your most loyal companion in this urban laboratory, so treat every measurement with the reverence of a journalist fact-checking a lead, ensuring your chemical environment is steady enough to let your creative brilliance truly shine.
## The Alchemist’s Equilibrium
“Setting up your electroforming bath is much like drafting a sprawling, epic novel; you can have all the grand ideas in the world, but if your chemical concentrations and electrical currents aren’t in perfect, rhythmic harmony, your story—and your metal—will simply fail to take shape.”
David Cedeno
The Alchemist’s Final Flourish
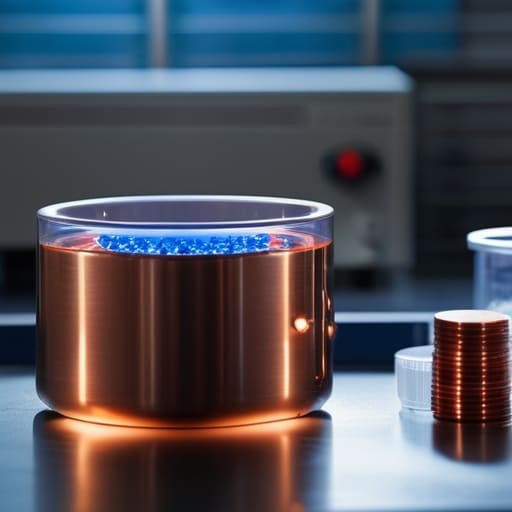
As we draw the curtain on this particular chapter of your technical journey, take a moment to appreciate the intricate machinery you’ve just assembled. We’ve navigated the delicate currents of electrolyte concentrations and mastered the rhythmic, almost poetic, placement of your anodes and cathodes. Setting up an electroforming bath is a bit like tuning a vintage cello; if the tension is off or the alignment is skewed, the resulting music—or in this case, your metal plating—will never truly sing. By ensuring your power settings are precise and your solution is perfectly balanced, you have moved past mere guesswork and into the realm of true technical mastery.
Now, as you stand before your glowing laboratory, remember that every great masterpiece began as a series of controlled experiments. Don’t be discouraged if your first few attempts feel as chaotic as a storm over Lake Michigan; even the most seasoned storytellers face a blank page before the narrative finds its flow. Treat your setup not as a static machine, but as a living, breathing extension of your creative will. Step into the light of your own curiosity, trust the processes you have built, and go forth to create something that is uniquely, unapologetically yours. The world is waiting for your metallic marvels.
Frequently Asked Questions
How do I know if my electrolyte solution is starting to "lose its soul" and needs a complete refresh?
Think of your electrolyte solution like a once-vibrant protagonist in a Dickens novel; eventually, the character development runs dry and the plot loses its spark. If you notice the liquid turning murky, or if your plating starts looking more like a patchy, uneven shadow than a polished masterpiece, your solution is losing its soul. When the chemistry feels sluggish and won’t hold its rhythm, it’s time to bid farewell to the old and brew a fresh batch.
Is there a way to prevent the dreaded "shadow effect" when my cathode shape gets a bit too complex for the current setup?
Ah, the dreaded “shadow effect”—it’s like trying to read a classic novel by candlelight when the wick is flickering too low; the details just vanish into the gloom. When your cathode shape gets complex, the ions struggle to reach those deep, tucked-away crevices. To fix this, think of it as brightening the room: try increasing your agitation or slowing down your current density. A bit of gentle movement ensures the “story” reaches every corner!
Can I use a more budget-friendly power supply, or is that like trying to write a masterpiece on a broken typewriter?
That’s a fantastic question! To use your metaphor: yes, a cheap, unstable power supply is exactly like trying to compose a Dickensian epic on a broken typewriter—the keys might strike, but the rhythm will be maddeningly inconsistent. In electroforming, “current ripple” is the villain here. If your power source fluctuates wildly, your plating will look more like a storm-tossed sea than a smooth masterpiece. Aim for stability; your metal deserves a steady hand.
