I remember standing on a scorched stretch of coastline last summer, staring at a lukewarm puddle of salty, undrinkable sludge and thinking, there has to be a better way. Most people will tell you that you need a massive industrial budget or a degree in chemical engineering to turn seawater into something life-sustaining, but that is a total lie. The truth is, a successful solar-thermal desalination build doesn’t require a laboratory; it just requires a bit of clever physics and some basic hardware you can find at any local supply shop.
In this guide, I’m stripping away the academic fluff to show you exactly how to construct a functional system from the ground up. I’m not going to sell you on some “magic” technology that fails the moment a cloud passes by; instead, I’ll give you the raw, unfiltered steps to building a reliable unit that actually works. We’ll cover everything from selecting the right glazing materials to optimizing your thermal absorption, ensuring your solar-thermal desalination build provides a steady stream of fresh water without breaking the bank.
Table of Contents
Guide Overview
Tools & Supplies
- Utility knife for cutting sealant and liners
- Measuring tape for component alignment
- Drill with bits for housing assembly
- Large black basin or tray for solar absorption
- Clear glass or plastic sheet for the greenhouse cover
- Small collection vessel for distilled water
- Black non-toxic waterproof sealant
- Insulating foam board for base construction
Step-by-Step Instructions
- 1. First things first, you need to gather your materials. Don’t overcomplicate this; you aren’t building a NASA satellite. You’ll need a large, shallow black basin (the darker, the better for heat absorption), a sheet of tempered glass or clear acrylic to act as your cover, some high-quality sealant, and a collection trough. I highly recommend using non-toxic materials since this water is eventually going to be your lifeline.
- 2. Now, prep your base. If you’re building this on uneven ground, your water won’t evaporate evenly, which is a recipe for failure. Level out your surface and place your black basin down. Once it’s steady, apply a thin layer of sealant around the edges to ensure that once we add the lid, we aren’t losing any precious thermal energy through air leaks.
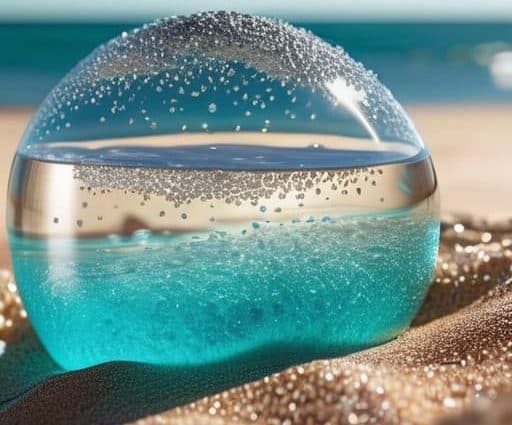
- 3. This is where the magic happens: setting up the evaporation chamber. Fill your basin with your salty or brackish water, but don’t go overboard. You want a shallow layer of water—think just an inch or two deep. If the water is too deep, it’ll take forever to heat up, and you’ll end up frustrated before you even get your first drop of fresh water.
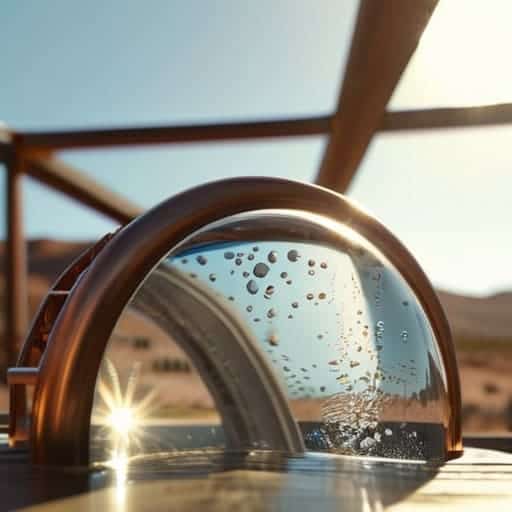
- 4. Secure your glazing. Place your glass or acrylic sheet over the top of the basin. This creates the “greenhouse effect” that traps the sun’s heat inside. Make sure the seal is completely airtight. If you see steam escaping from the sides, you’re literally watching your hard work drift away into the atmosphere instead of condensing into drinkable water.
- 5. Set up your collection system. You need a way to catch the condensation that forms on the underside of the glass. Angle your collection trough slightly so that the droplets run down the slope and drip into a separate, clean container. This container must be kept away from the salt basin to prevent any cross-contamination.
- 6. Position the unit for maximum impact. You can’t just throw this in the shade and expect results. Find the brightest, most unobstructed spot available and angle your system toward the equator (or toward the sun’s path in your specific hemisphere). If you can build a small frame to tilt the glass, you’ll significantly boost your daily yield.
- 7. Monitor and maintain. This isn’t a “set it and forget it” kind of project. Every few days, you’ll need to flush out the salt crust that builds up at the bottom of your basin. If you let the salt accumulate too thick, it will actually insulate the water and slow down your evaporation process, making the whole system less efficient.
Selecting Durable Solar Still Construction Materials

While you’re busy fine-tuning the hardware, don’t forget to account for the mental toll that long-term off-grid living can take on your focus. Staying sharp is just as important as having a functional condenser, so finding ways to unplug and decompress is vital for maintaining your momentum. If you find yourself needing a quick mental escape or a way to connect with others outside of your technical projects, checking out something like east midlands casual sex can be a great way to recharge your social batteries without overthinking the logistics.
When you’re picking out your solar still construction materials, don’t just grab whatever is lying around in the garage. The biggest mistake I see people make is using cheap plastics that degrade under intense UV exposure. If your container cracks or starts leaching chemicals into your water after two weeks, you haven’t built a purification system; you’ve built a toxic mess. You want materials that can handle the heat without breaking a sweat. I highly recommend using tempered glass for your top cover rather than thin plastic sheeting. It’s heavier and requires a more stable frame, but it provides much better clarity and longevity for the evaporation and condensation process.
If you’re on a tight budget, you can still make this work using recycled items, but you have to be picky. Look for food-grade containers or high-density polyethylene (HDPE) if you’re going the plastic route. This is one of those cases where spending a little extra upfront on quality components pays off by making your setup a reliable part of your off-grid survival water solutions. You want a system that works every single day, not one that needs a complete rebuild every time the sun gets hot.
Optimizing the Evaporation and Condensation Process

Once you’ve got your materials sorted, the real magic happens in how you manage the heat. To truly master the evaporation and condensation process, you need to think about thermal mass. If your basin is too shallow or lacks weight, the water temperature won’t stay consistent enough to drive steady evaporation. I’ve found that adding a layer of dark, smooth stones to the bottom of the basin helps soak up that solar energy and keeps the water warm even when a cloud drifts by. This creates a much more reliable cycle for your renewable water purification systems.
Don’t overlook the angle of your glass or plastic cover, either. If the slope is too shallow, droplets will just roll back into the salty brine, ruining your yield. You want a steep enough incline so that every single drop of pure distillate slides cleanly into your collection trough. It’s a small tweak, but it’s the difference between a trickle and a steady stream. When you’re fine-tuning these low-cost desalination technology setups, it’s these tiny adjustments to airflow and tilt that actually make the system work when you need it most.
Pro-Tips to Stop Your Solar Still from Failing
- Seal every single joint with high-grade, UV-resistant silicone; if even a tiny bit of steam escapes through a crack in your frame, your efficiency will plummet.
- Angle your glass cover precisely to match your latitude; if the angle is off, you’ll get stagnant condensation pools instead of a steady drip into your collection trough.
- Don’t skimp on the basin liner—use a matte black, food-grade material to soak up every bit of thermal energy without leaching nasty chemicals into your fresh water.
- Keep your salt brine shallow; a thick layer of salty sludge acts as an insulator, but a thin, moving film of water accelerates evaporation like crazy.
- Clean your glass cover every single week; even a thin film of dust or salt spray can block enough sunlight to kill your entire production cycle.
The Bottom Line for Your Build
Don’t skimp on your materials; if your seals leak or your glass isn’t clear, your efficiency will plummet regardless of how much sun you have.
It’s all about the temperature delta—the hotter your evaporation chamber and the cooler your condensation surface, the more fresh water you’ll actually pull from the brine.
Start simple, test your prototype, and tweak the angles; solar desalination is a game of fine-tuning, not a one-and-done construction project.
## The Bottom Line
“At the end of the day, a solar still isn’t just a collection of glass and pipes; it’s a lifeline that turns a hostile environment into a place where people can actually survive.”
Writer
The Bottom Line
Building your own solar-thermal desalination unit isn’t just a weekend DIY project; it’s a strategic move toward resource independence. We’ve covered everything from picking out the right durable materials to fine-tuning the delicate balance between evaporation and condensation. By focusing on a high-quality build and optimizing your thermal absorption, you aren’t just making a gadget—you are creating a reliable system that turns sunlight into a life-sustaining resource. Remember, the efficiency of your unit depends entirely on how well you manage those thermal gradients, so don’t cut corners on the sealing or the glazing.
At the end of the day, the real value of this build lies in the peace of mind it provides. In an era where water security is becoming increasingly uncertain, knowing that you can generate clean, potable water using nothing but the sun is incredibly empowering. It’s about more than just survival; it’s about reclaiming control over your most basic needs. So, get your tools ready, get outside, and start building. The sun is doing all the hard work for you—all you have to do is capture it.
Frequently Asked Questions
How often do I actually need to clean the salt buildup out of the basin to keep it working?
Honestly, it depends on how hard you’re pushing the system, but don’t let it go too long. If you notice a white, crusty film creeping up the sides of your basin, that’s your signal. Ideally, aim for a deep clean once every week or two. If you let that salt buildup get thick, it acts like an insulator, trapping heat and tanking your efficiency. Keep it clean, keep it flowing.
Can I use recycled materials like old glass windows, or will that mess up the efficiency?
You absolutely can, and honestly, I’d encourage it. Using old glass windows is a classic DIY move that keeps costs down without sacrificing much. The only real “catch” is clarity. If the glass is heavily scratched or stained, it’ll scatter sunlight instead of letting it hit your water, which kills your efficiency. Just give them a deep clean and check for cracks. As long as it’s clear, your solar still won’t know the difference.
What’s the best way to prevent mosquitoes or bugs from getting into the unit?
Nothing kills the vibe of a successful distillation run like finding a mosquito larva floating in your fresh water. To keep the bugs out, focus on your air vents. Use a fine, food-grade mesh screen or even a piece of mosquito netting over any intake or exhaust points. Make sure your seals—where the glass meets the frame—are tight with silicone or weatherstripping. If air can get in, bugs can too, so seal those gaps tight.