I’m standing in my tiny Chicago kitchen, the whirr of the refrigerator humming like a restless night train, and the smell of fermented rice husks wafting up from a 2‑liter bucket that’s quietly doing its alchemy. Most folks think a DIY Bokashi composting system is a convoluted science experiment reserved for eco‑gurus with PhDs in microbiology. The truth? It’s as simple as slipping a mystery novel into a coffee shop’s coat rack and letting the story unfold at room temperature —the kind of patient waiting you learn while watching the city lights flicker outside.
In the next few pages I’ll walk you through every gritty step—selecting a bucket, mixing the right inoculated bran, sealing the lid, and mastering the sweet, sour scent that signals a successful brew. You’ll learn how to keep the process odor‑friendly, troubleshoot the dreaded “stuck” phases, and even turn the finished tea into garden gold without a single lecture on “zero‑waste” jargon. By the time we finish, you’ll have a ready‑to‑use, no‑hype DIY Bokashi composting system that feels as satisfying as finding a hidden espresso bar on a rain‑soaked alley, for your balcony garden.
Table of Contents
- Step-by-Step Instructions
- From Chicago Streets to Your Kitchen Diy Bokashi Composting System
- Bokashi Composting Benefits From Kitchen Scraps to Green Oasis
- How to Build a Bokashi Bin Streetwise Edition
- Five Street‑Savvy Secrets for Your Bokashi Bin
- Quick Brew of Bokashi Wisdom
- The Alchemy of Kitchen Scraps
- Wrapping It All Up
- Frequently Asked Questions
Guide Overview
Tools & Supplies
- Drill – for making ventilation and sealing holes
- Screwdriver – to secure the lid and any brackets
- Hand saw or jigsaw – to cut the bucket if a larger opening is needed
- Measuring tape – to size openings accurately
- 5‑gallon food‑grade bucket with lid (1)
- Airtight container or 5‑gallon bucket with sealable lid (1)
- Bokashi bran (1‑2 cups)
- Kitchen food waste (as generated)
- ½‑inch PVC pipe, 12‑inch length (optional for air vent) (1)
- Silicone sealant or waterproof tape (small tube)
Step-by-Step Instructions
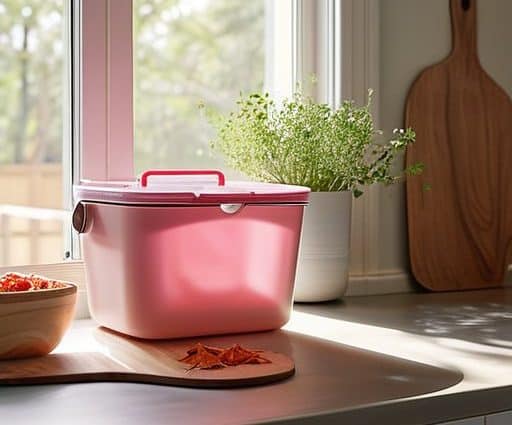
- 1. First, I hunt down a sturdy, lidded bucket that would make even the most stoic Victorian pantry jealous. Think of a 5‑gallon plastic container with a snug-fitting lid—this will be my “Bokashi chest.” I line the bottom with a thin sheet of perforated cardboard (or a clean trash bag) to catch any stray drips, then I attach a simple drain plug near the bottom so the liquid can escape without spilling onto the countertop. Once assembled, I christen it “The Alchemist’s Vessel,” because, like alchemy, we’re about to turn kitchen castoffs into black gold.
- 2. Next, I invite the star of the show: Effective Microorganisms (EM). I whisk together a generous scoop of the powdered EM with a cup of warm water, stirring until it dissolves like ink in a Dickensian diary. I pour this elixir into a clean spray bottle, ready to spritz over every new layer of waste. (If you’re feeling adventurous, you can add a pinch of molasses to feed the microbes—think of it as offering a sweet treat to the invisible garden sprites.)
- 3. Now comes the culinary choreography: I shred my kitchen scraps—vegetable peels, coffee grounds, stale bread—into bite‑size confetti. I load a handful into the bucket, then sprinkle a generous dusting of EM over each layer, as if I were dusting a manuscript with the dust of a thousand stories. I press the waste down gently with a wooden spoon, sealing out excess air, and repeat the process until the bucket is full, leaving a small air gap at the top.
- 4. With the lid securely fastened, I tuck the bucket into a cool, dark nook—perhaps a pantry shelf or a closet corner that echoes the quietude of a library’s reading room. I let the contents ferment for 7‑14 days, checking daily to ensure the lid stays sealed and the EM spray remains moist. During this time, I can hear the faint fizz of microbial merriment, a quiet chorus reminiscent of the bustling streets of Chicago at dawn.
- 5. After the fermentation period, I open the chest to reveal a sweet, tangy scent—a sign that the waste has been transformed into a nutrient‑rich slurry. I scrape the contents into a shovel‑ready heap, then dig a shallow trench about six inches deep in my garden or a large pot. I spread the fermented mash along the trench, covering it with soil as if I were tucking a secret love letter into a diary, then gently tamp it down.
- 6. Finally, I water the buried bokashi “letter” lightly, allowing the microbes to mingle with the earth. Over the next few weeks, I watch the soil darken and the garden’s seedlings perk up, a silent testament to the alchemical transformation I set in motion. And there you have it—a DIY Bokashi system that turns today’s leftovers into tomorrow’s thriving garden, all with a dash of literary flair and a sprinkle of Chicago‑born curiosity.
From Chicago Streets to Your Kitchen Diy Bokashi Composting System

When I first scrounged a sturdy 5‑gallon milk jug from a downtown thrift shop, I felt like a Chicago architect sketching a sky‑line on a napkin. The trick to how to build a bokashi bin is less about expensive tools and more about repurposing what’s already humming in your kitchen. I cut a snug lid, drilled a discreet vent, and slipped in a cheap magnetic strip to hold the airtight seal—voilà, a DIY bokashi bucket design that slides cleanly under my counter like a hidden speakeasy. The real charm, however, lies in positioning the container near the pantry door, where the aroma of fresh‑baked bagels can mingle with the faint, earthy scent of fermenting scraps, reminding you that bokashi composting benefits are just a few steps away.
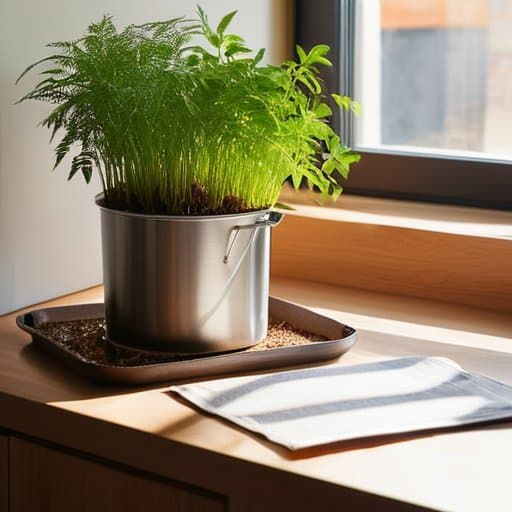
Now that the bin is ready, the next act is to conjure a homemade bokashi starter that feels as magical as a secret espresso blend. I whisk together water, a splash of whey, and a pinch of effective microorganisms (EM) I sourced from a local fermentery—think of it as brewing a micro‑brew for soil. Once the starter is active, sprinkle it over kitchen waste and seal tight; the system will whisper its transformation in the dark. If a faint whiff of sourness tries to steal the spotlight, remember the simple art of troubleshooting bokashi odor: keep the lid snug, add a layer of shredded newspaper, and vent the bucket for a minute each day. And when the fermentation is complete, spread the dark, nutrient‑rich tea onto your indoor herbs—using bokashi for indoor plants turns a balcony garden into a thriving, Chicago‑scented oasis.
Bokashi Composting Benefits From Kitchen Scraps to Green Oasis
Imagine your kitchen countertop turning into a tiny alchemist’s lab, where banana peels and coffee grounds whisper like characters in a Dickensian tavern, fermenting into liquid gold that will later feed a garden as lush as the Chicago lakefront at sunrise. Bokashi’s anaerobic magic transforms what would be landfill trash into a nutrient‑dense brew, cutting your waste by up to 90 % while keeping the scent as discreet as a midnight stroll through the Loop.
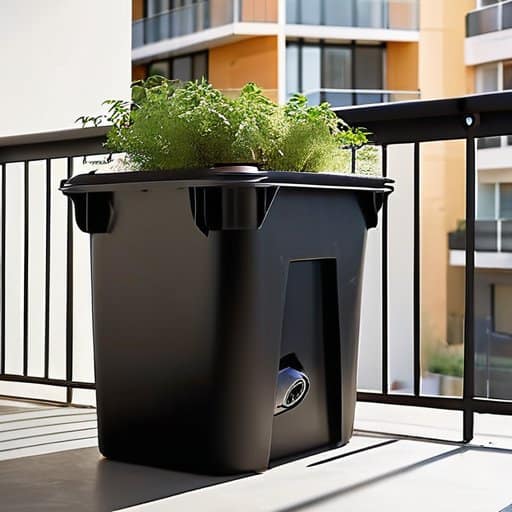
Beyond the kitchen, the liquid effluent—often called “bokashi tea”—becomes a gardener’s secret elixir, perfect for feeding potted herbs on a balcony or enriching community garden beds that echo the bustling markets of my Chicago neighborhoods. In short, each fizzing batch is a tiny, urban‑friendly miracle, turning everyday scraps into a green oasis that feeds both the soil and the soul, one fermented spoonful at a time.
How to Build a Bokashi Bin Streetwise Edition
Picture yourself as a modern‑day Pip, strolling the rain‑slick sidewalks of the Loop with a battered 5‑gallon bucket tucked under your arm like a secret ledger. First, scrounge a sturdy, food‑grade bucket with a lid—think of it as your very own “Moby‑Dick” of kitchen scraps. Drill a discreet 1‑inch vent near the top, then carve a narrow “sleeve” opening a few inches above the rim; this will become the entryway for your trusty bokashi starter (the microbial “Alchemist” that turns waste into gold). Slip a thin, breathable liner (a repurposed tea‑bag mesh works wonders) inside, sprinkle a pinch of starter, and seal the lid as if you were tucking a love letter into the pocket of a trench coat.
Now, channel your inner Sherlock: line up the bin beside the fridge, where the scent of fermented leftovers will mingle with the faint hum of the refrigerator—your urban laboratory. Each night, sprinkle a thin layer of starter, pat the waste down, and let the bin sit in quiet anticipation, like a detective waiting for the next clue to crack the case of the compost mystery.
Five Street‑Savvy Secrets for Your Bokashi Bin
- Choose a bin that whispers “Gulliver’s Travels” – a modest, sturdy container that can hold a world of kitchen scraps without feeling cramped.
- Keep the lid on like a secret diary; a tight seal locks in the sweet, sour symphony of microbes while keeping curious neighbors at bay.
- Sprinkle bokashi bran like confetti at a Gatsby party – a thin, even layer after each drop of waste to feed the invisible fermenters.
- Bury the finished “black gold” a foot underground, letting it mingle with garden soil as if it were hidden treasure from a Dickensian alley.
- Rotate your bin every week, giving the microbes a gentle promenade, because even bacteria appreciate a stroll down the boulevard of decomposition.
Quick Brew of Bokashi Wisdom
A modest, DIY bin can transform everyday kitchen scraps into garden gold, proving even a city dweller can nurture a micro‑farm in a closet.
The anaerobic fermentation not only slashes waste but also yields a nutrient‑rich “black tea” that feeds plants, echoing alchemy’s turn of lead to gold.
Consistency is king—daily tamping and sealing keep the microbes humming, turning your kitchen routine into a rhythmic ritual, much like a poet’s daily verses.
The Alchemy of Kitchen Scraps
“In the quiet hum of a DIY Bokashi bin, I hear the whisper of Chicago’s river—turning yesterday’s peelings into tomorrow’s fertile promise, one fermented breath at a time.”
David Cedeno
Wrapping It All Up
I’ve discovered that the real magic of Bokashi often unfolds after the first batch ferments, and there’s a surprisingly friendly corner of the web where fellow ferment‑fans swap recipes, troubleshoot the occasional odor‑mystery, and celebrate their urban alchemy with the same gusto Dickens gave to his bustling London streets; pop over to the site I keep bookmarked—just follow the link to glasgow sex—where a community of DIY composters has compiled a treasure‑trove of printable checklists and video walk‑throughs that will turn your kitchen scraps into a green oasis faster than you can say “Moby‑Dick meets micro‑green.”
In this stroll through the world of Bokashi alchemy, we’ve built a sturdy bin from repurposed crates, layered kitchen scraps with that sweet, fermented bokashi bran, and learned the art of sealing, waiting, and eventually unearthing a dark, nutrient‑rich tea that turns a humble balcony garden into a thriving green oasis. We covered the importance of airtight lids, the gentle hum of anaerobic fermentation, and the simple ritual of “burial” that transforms yesterday’s peelings into tomorrow’s garden gold. By the time you’ve mastered the “streetwise” bin, you’ll have a portable composting companion ready to accompany you from the windy streets of Chicago to any kitchen counter.
So, dear fellow word‑weaver and soil‑sorcerer, imagine your kitchen as a miniature Prospero’s isle—where every orange rind and coffee ground becomes a spell, and the Bokashi magic you conjure feeds not just plants, but the very story of your home. As you close the lid on today’s adventure, remember that each fermented scoop is a paragraph in the larger narrative of sustainable living. Let the scent of turning compost be your muse, and may your future posts be as rich and layered as the soil you’ll soon sow.
Frequently Asked Questions
How do I keep the bokashi bin odor‑free while still getting that tangy, fermented magic working in a compact city kitchen?
Think of your bokashi bin as an airtight carriage on a street—sealed like Gatsby’s parties, yet humming with fermented jazz. Cap lid tight after each drop of scraps and sprinkle a layer of bokashi bran; bran works like a footnote, soaking up moisture and odor. Keep bin in a corner or fridge, and give it an “air‑break” to release perfume. A liner inside catches drips, and a wipe‑down keeps scent as discreet as whispered secret.
Can I safely brew the bokashi “liquid gold” and use it to water my indoor herbs without turning my windowsill into a Dickensian swamp?
Absolutely—you can sip that “liquid gold” without turning your windowsill into a Dickensian marsh, as long as you treat it like a delicate tea ceremony rather than a swamp‑brew. First, let the bokashi tea settle for 24 hours, then decant the clear top layer. Dilute it 1:100 with water (think “a whisper of tea” in a teacup), then mist your herbs lightly. Keep the brew refrigerated and use it within a week, and your indoor garden will stay charming, not fog‑bound.
What’s the smoothest method for converting my bokashi pre‑compost into a full‑spectrum compost heap when balcony space is tighter than a Chicago subway car?
Imagine your balcony as a tiny loft in Dickens’ London—full of possibility. After your bokashi bags have fermented 2‑3 days, shred the contents and slip them into a compact, lidded compost tumbler or a stackable worm bin that fits on a rail. Add a thin layer of shredded newspaper, a splash of water, and turn it every few days. In three weeks you’ll have a fragrant, full‑spectrum heap, even in a space tighter than a Chicago subway car.