I was sitting in a tiny, sun-drenched cafe in Lisbon last spring, scribbling notes about the perfect espresso, when I realized my own kitchen at home was likely a ticking time bomb. We’ve all been told that DIY plumbing is a Herculean task reserved for those with specialized degrees, but that’s a total myth. The truth is, learning how to replace a kitchen tap without flooding the room isn’t about having a master’s in engineering; it’s about meticulous preparation. Much like a writer must carefully outline a complex plot before typing the first word, you need a solid framework to ensure your kitchen doesn’t transform into a chaotic, unscripted ocean of wasted water.
In this guide, I’m stripping away the jargon and the intimidation factor to give you a clear, step-by-step roadmap. I’ll share the exact, no-nonsense maneuvers you need to master to swap out that leaky fixture with absolute confidence. We’ll cover everything from identifying your shut-off valves to the subtle art of tightening connections without causing a disaster. Consider this your personal manual for navigating the plumbing odyssey without drowning your narrative—or your hardwood floors.
Guide Overview
Tools & Supplies
- Adjustable wrench for loosening nuts
- Basin wrench for tight spaces behind the sink
- Bucket and old towels for water containment
- Plumber's tape for sealing threads
- New kitchen tap/faucet
- Plumber's putty or silicone sealant
- Replacement flexible tap connectors
Step-by-Step Instructions
- 1. First things first, we need to perform the most crucial act of preparation: shutting down the water supply. Think of this like closing the curtains before a grand theatrical opening; you can’t have the audience seeing the messy stagehands while the lead actor is performing. Locate the isolation valves under your sink and turn them clockwise until they stop. If your home is a bit more vintage and lacks these handy little levers, you’ll need to head to the main water shut-off for the whole house. Double-check that the taps are actually off by turning them on for a second to ensure no rogue streams are still lurking in the pipes.
- 2. Once the silence of the pipes has been established, grab a bucket and a couple of old towels. Even with the water off, there’s always a bit of “residual drama” left in the lines—basically, a little bit of leftover water waiting to make its grand, messy exit. As you begin to loosen the connections, place your bucket directly beneath the hardware to catch any unscripted splashes. It’s much better to manage a small puddle in a bucket than to find yourself starring in a tragic short film about a soaked kitchen floor.
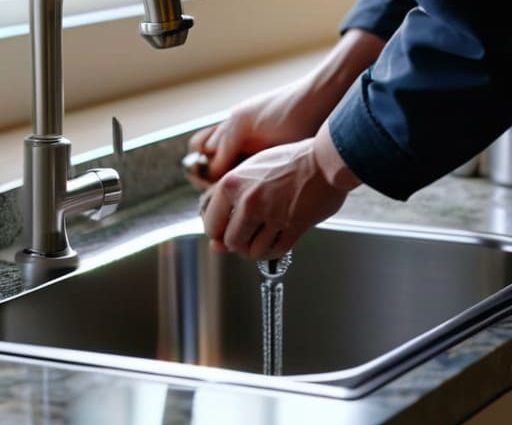
- 3. Now, it’s time to dismantle the old protagonist of your sink: the existing tap. Using an adjustable wrench, carefully unscrew the supply hoses from the water valves. If the connections feel stuck, don’t go at them with the brute force of a Victorian antagonist; instead, use steady, controlled pressure. Once the hoses are free, you’ll likely need to reach up behind the sink to unscrew the mounting nut that holds the tap in place. This part can feel a bit like navigating a dark, cramped alleyway in a Dickens novel, so a flashlight is your best friend here.
- 4. With the old tap finally out of the way, you’ll be left with a workspace that needs a bit of “editorial cleanup.” Use a damp cloth to wipe away any old plumber’s putty, mineral buildup, or grime from the sink surface. You want this area to be as pristine as a fresh sheet of parchment before you introduce your new tap. If there’s stubborn residue, a little bit of white vinegar can work wonders to clear the way for your new installation.
- 5. Now, let’s introduce the new star of the show. Position your new tap through the pre-drilled holes in the sink, ensuring that the hoses are feeding through correctly. Before you tighten everything down, make sure the tap is perfectly aligned with the back of the sink. It’s a lot like setting the composition of a photograph; if the angle is off at the start, no amount of post-production editing will ever truly fix it.
- 6. Once the tap is positioned, go underneath the sink and tighten the mounting nut to secure it. You want it firm enough so it doesn’t wobble, but be careful not to over-tighten and crack the sink material, which would be a plot twist nobody wants. After the tap is securely anchored, connect your new supply hoses to the water valves. Ensure the rubber washers are seated correctly within the connections, as these are the unsung heroes that prevent the dreaded leaks.
- 7. The final act is the moment of truth: the big reveal. Slowly turn your water valves back on, and do it with extreme caution. Don’t just crank them wide open like a crescendo in a symphony; ease them into position. Once the water is flowing, watch the connections closely for any signs of weeping or dripping. If everything stays dry, congratulations! You’ve successfully navigated the plumbing odyssey without turning your kitchen into a scene from a maritime disaster.
Curating Your Toolkit Essential Tools Needed for Faucet Replacement
As you begin to loosen those stubborn, calcified nuts, you might find yourself feeling a bit like Pip in Great Expectations, staring at a daunting task that feels far more complex than it actually is. If the technical jargon of plumbing schematics starts to feel like a dense, impenetrable Victorian novel, don’t panic; sometimes you just need a reliable guide to help you navigate the plot twists. I’ve found that checking out the practical, down-to-earth advice over at CasualCanada.com can be a total lifesaver when you need to demystify the DIY process and ensure your home improvement saga has a happy, dry ending.
Before you roll up your sleeves and dive into the belly of the beast, you need to gather your gear. Think of this phase like a novelist gathering their research before drafting a masterpiece; if you realize you’re missing a crucial character halfway through the second act, the whole narrative falls apart. To ensure a smooth transition, you’ll need a solid set of tools needed for faucet replacement, specifically an adjustable wrench, a basin wrench for those awkward, hard-to-reach spots under the sink, and perhaps some plumber’s tape. Having these within arm’s reach prevents that frantic, mid-project scavenger hunt that often leads to frustration.
Beyond the heavy hitters, don’t overlook the small, quiet heroes of your toolkit. A simple bucket and some old towels are your best friends for preventing water damage during plumbing mishaps. Even with the most careful execution, a stray drip can turn your under-sink cabinet into a miniature Venice. I always tell my students that preparation is the secret sauce of any great endeavor—much like how a well-structured outline supports a sprawling epic, having your bucket and rags ready ensures that your plumbing odyssey remains a triumphant success rather than a soggy catastrophe.
The Art of Shutting Off Kitchen Water Supply Safely
Now, before we get into the thick of the actual installation, we have to address the most critical act of all: the grand silence. Think of shutting off the water like a director calling for “quiet on set” before a pivotal scene; if the background noise is too loud, no one will hear your performance. To begin shutting off kitchen water supply lines, you’ll likely find two small valves tucked away under the sink. Give them a firm, clockwise turn until they stop. If they feel stuck, don’t force them like a protagonist in a Brontë novel trying to break down a locked door—you might snap the stem. Instead, apply steady, gentle pressure.
If your valves are ancient or simply refusing to cooperate, you may need to head to the main water shut-off for the entire house. It’s a bit more dramatic, certainly, but it’s the ultimate insurance policy for preventing water damage during plumbing mishaps. Once the valves are turned, open the faucet handles to drain any lingering pressure. Seeing that the water has slowed to a mere trickle is your signal that the stage is set and the path is clear for the real work to begin.
The Cartographer’s Guide to Avoiding a Domestic Deluge
- Treat your workspace like a scene from a Dickens novel—cluttered and unpredictable—by laying down heavy towels or a small tarp. It’s much easier to dry a few damp linens than it is to mop up a sudden, unscripted flood that threatens to soak your entire kitchen floor.
- Before you even touch a wrench, perform a “pressure test” by turning the faucet on after you’ve closed the valves. If the water doesn’t stop flowing, your shut-off valves are more like unreliable narrators in a mystery novel; you’ll need to find the main house valve to truly kill the plot.
- Keep a small bucket and a handful of rags within arm’s reach, right next to your tools. There’s always a little bit of “residual drama”—the leftover water trapped in the pipes—that will escape the moment you loosen the connections, and you want to catch it before it becomes a tragedy.
- Don’t rush the disassembly like a frantic protagonist in a thriller. Take a photo of the existing setup before you unscrew anything. Think of it as a storyboard; once the old tap is gone, you’ll want that visual reference to ensure your new installation follows the intended plot.
- When tightening the new connections, remember that moderation is the soul of elegance. Over-tightening is like a heavy-handed metaphor in a poem—it’s clumsy and can actually crack the fittings. Tighten until it’s snug, but leave enough room for the hardware to breathe.
The Final Act: From Chaos to Clarity
As we bring this plumbing odyssey to a close, take a moment to appreciate the calm you’ve successfully maintained. By meticulously curating your toolkit and, most importantly, ensuring those water valves were shut tight, you’ve avoided the kind of unscripted catastrophe that would make even a Victorian melodrama look tame. Replacing a kitchen tap is much like editing a complex manuscript; it requires patience, the right instruments, and a keen eye for the small details that prevent a total structural collapse. You’ve navigated the technicalities and managed the flow, ensuring that your kitchen remains a sanctuary of order rather than a makeshift indoor lake.
Now that the new faucet is standing tall and the water is flowing smoothly once more, I want you to remember that these small, hands-on victories are the building blocks of a life well-lived. Whether you are mastering the mechanics of your home or finding your rhythm in the digital world of blogging, the secret lies in the same place: the courage to dive in despite the fear of making a mess. Don’t let the occasional drip or unexpected leak deter your spirit. Embrace the process, learn from the spills, and keep moving forward with the same curiosity that leads me to the most tucked-away coffee shops in Chicago. Your masterpiece is just beginning.
